Best Practices for Recording Clear Audio with Your iPhone Microphone
In the age of digital content creation, having the ability to record clear and high-quality audio is essential, especially when using ubiquitous devices like the iPhone.
The iPhone's built-in microphone is surprisingly capable, but knowing how to maximize its potential is key to achieving professional-grade audio recordings. Here are some best practices for recording clear audio with your iPhone microphone.
1. Find a Quiet Environment
Background noise can significantly degrade the quality of your audio recording. Find a quiet environment to record your audio. This means avoiding places with a lot of ambient noise like busy streets, cafes, or crowded rooms. Even the hum of a refrigerator or air conditioning can be picked up by your iPhone's sensitive microphone.
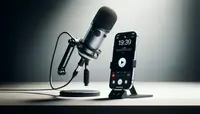
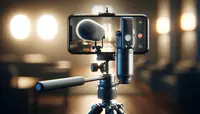
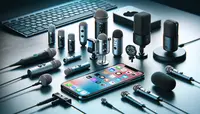
2. Use an External Microphone (If Possible)
While the iPhone's built-in microphone is decent for casual use, for higher quality recordings, consider investing in an external microphone that is compatible with the iPhone. This can dramatically improve the clarity and richness of your audio.
Here are the best external microphones for iPhone.
3. Optimize Your Settings
Before recording, make sure to check your iPhone's settings. Turn off any unnecessary features that might interfere with recording, like notifications, to avoid interruptions. Also, ensure that your recording app is set to the highest possible quality.
4. Hold Your iPhone Properly
The way you hold your iPhone can impact the quality of the recording. Hold your iPhone close enough to your mouth to capture clear audio but not so close that it picks up unnecessary sounds like breathing or popping noises. Avoid covering the microphone with your hand.
5. Use a Windscreen in Outdoor Environments
If you're recording outdoors, even a slight breeze can create distracting noise in your audio. Use a small windscreen over your iPhone's microphone to reduce wind noise.
6. Record a Test Clip
Before starting your actual recording, do a quick test clip. This will help you identify any potential issues with your recording environment or settings, allowing you to make necessary adjustments.
7. Edit Your Audio
After recording, use audio editing software to clean up your audio. You can remove background noise, adjust levels, and apply filters to enhance the overall quality of your recording.
8. Practice Good Vocal Techniques
Your voice is an instrument, and how you use it can affect the quality of your audio. Speak clearly and at a steady pace. Make sure to articulate your words and modulate your tone to keep your recording engaging.
Conclusion
Recording clear audio with your iPhone doesn't require professional equipment or studios. By following these simple best practices, you can significantly improve the quality of your audio recordings, making them more professional and pleasing to the ear.
I’ve written several other tutorial about audio recording on iPhones, such as how to record a podcast on an iPhone, or how to record an interview using an iPhone.
Author

Maxime Levesque is a technical engineer with more than 5 years of professional experience. He is an expert in computer and phones, mostly on Apple products. Maxime is also the founder of TechBrowser.


Post your comment